A2A Agent Cost Tracking
LiteLLM supports adding custom cost tracking for A2A agents. You can configure:
- Flat cost per query - A fixed cost charged for each agent request
- Cost by input/output tokens - Variable cost based on token usage
This allows you to track and attribute costs for agent usage across your organization, making it easy to see how much each team or project is spending on agent calls.
Quick Start
1. Navigate to Agents
From the sidebar, click on "Agents" to open the agent management page.
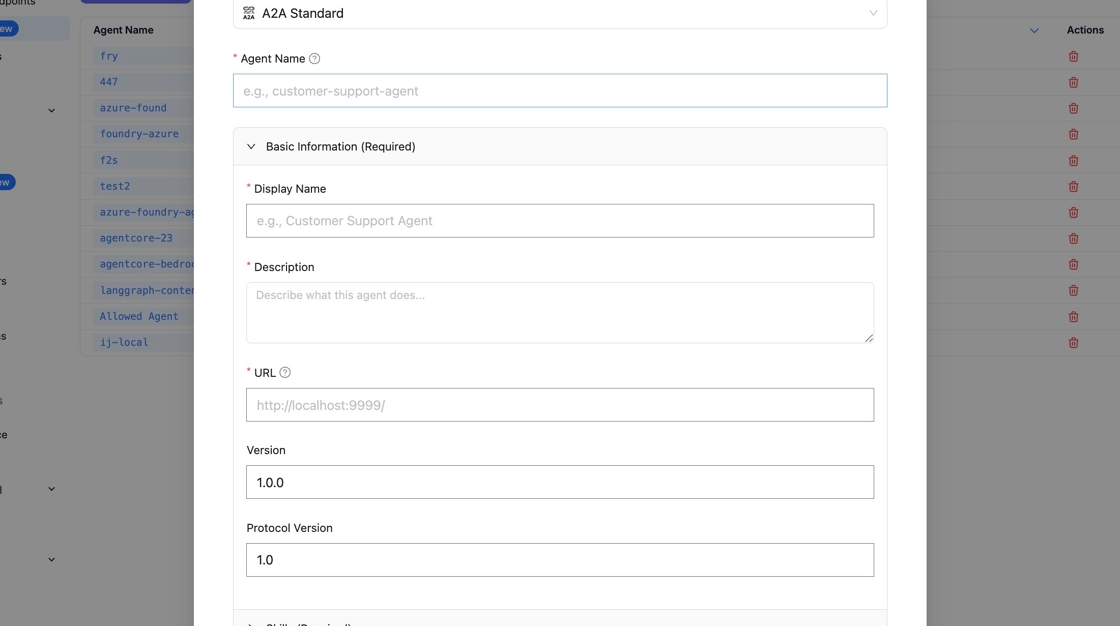
2. Create a New Agent
Click "+ Add New Agent" to open the creation form. You'll need to provide a few basic details:
- Agent Name - A unique identifier for your agent (used in API calls)
- Display Name - A human-readable name shown in the UI


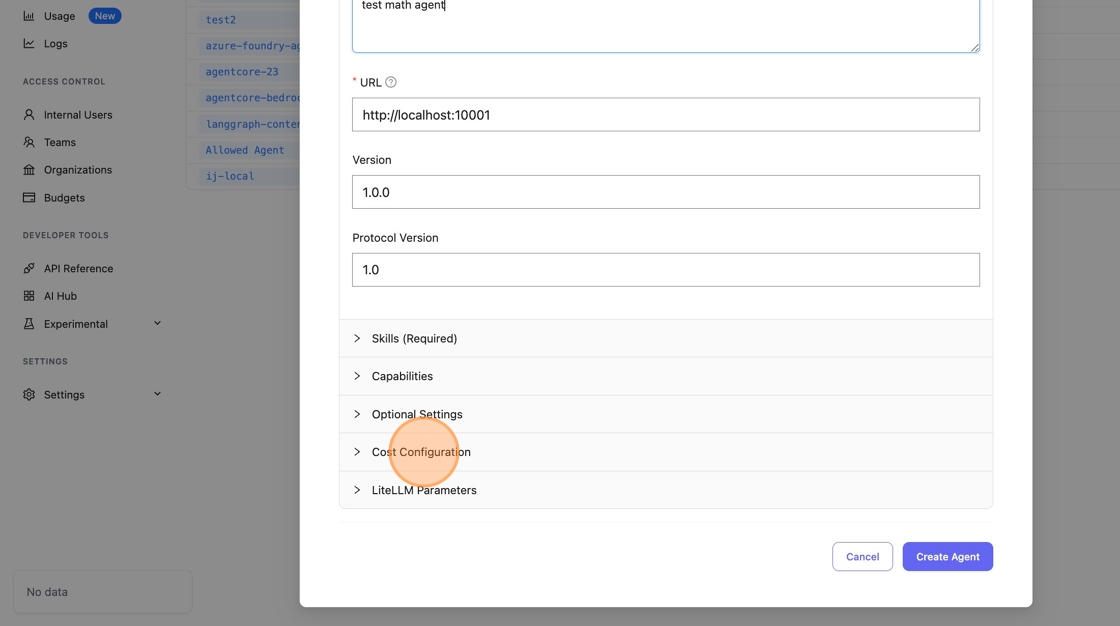
3. Configure Cost Settings
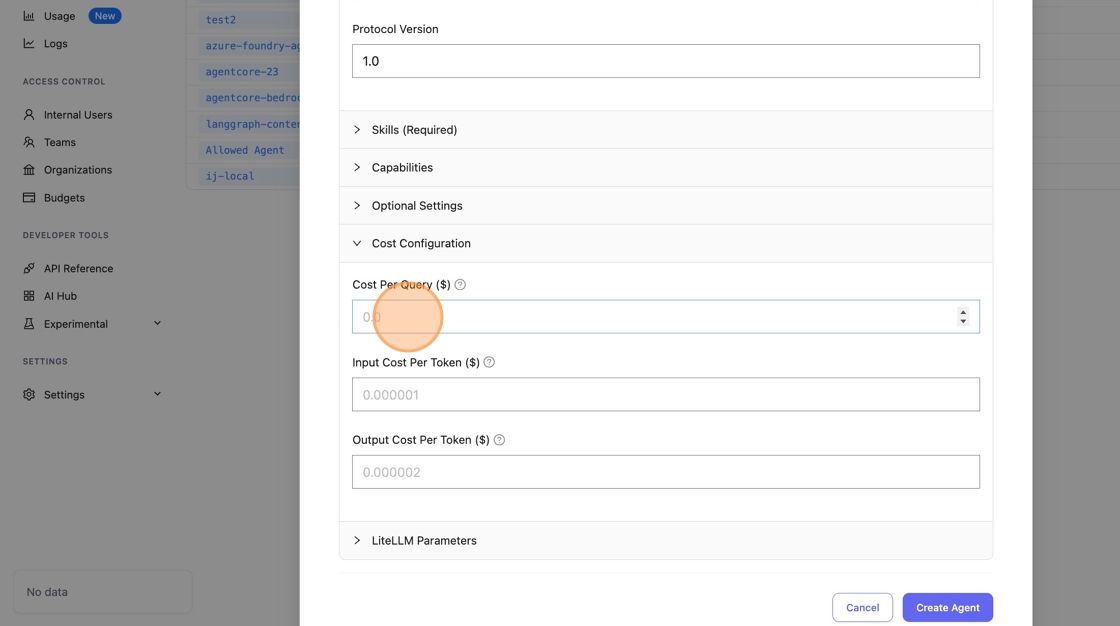
Scroll down and click on "Cost Configuration" to expand the cost settings panel. This is where you define how much to charge for agent usage.
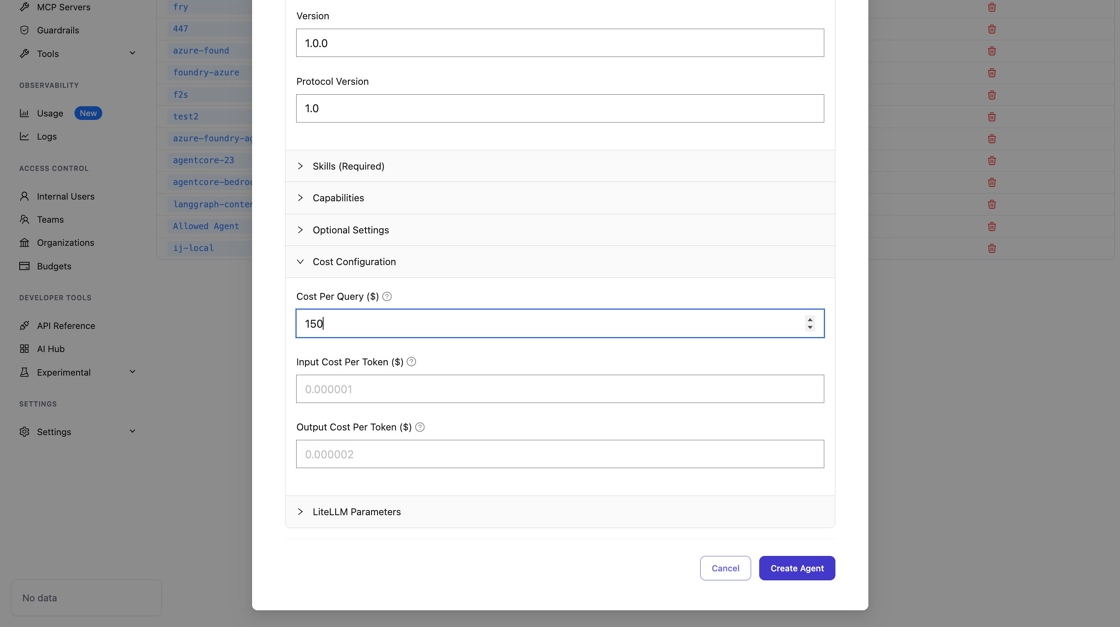
4. Set Cost Per Query
Enter the cost per query amount (in dollars). For example, entering 0.05 means each request to this agent will be charged $0.05.
5. Create the Agent
Once you've configured everything, click "Create Agent" to save. Your agent is now ready to use with cost tracking enabled.

Testing Cost Tracking
Let's verify that cost tracking is working by sending a test request through the Playground.
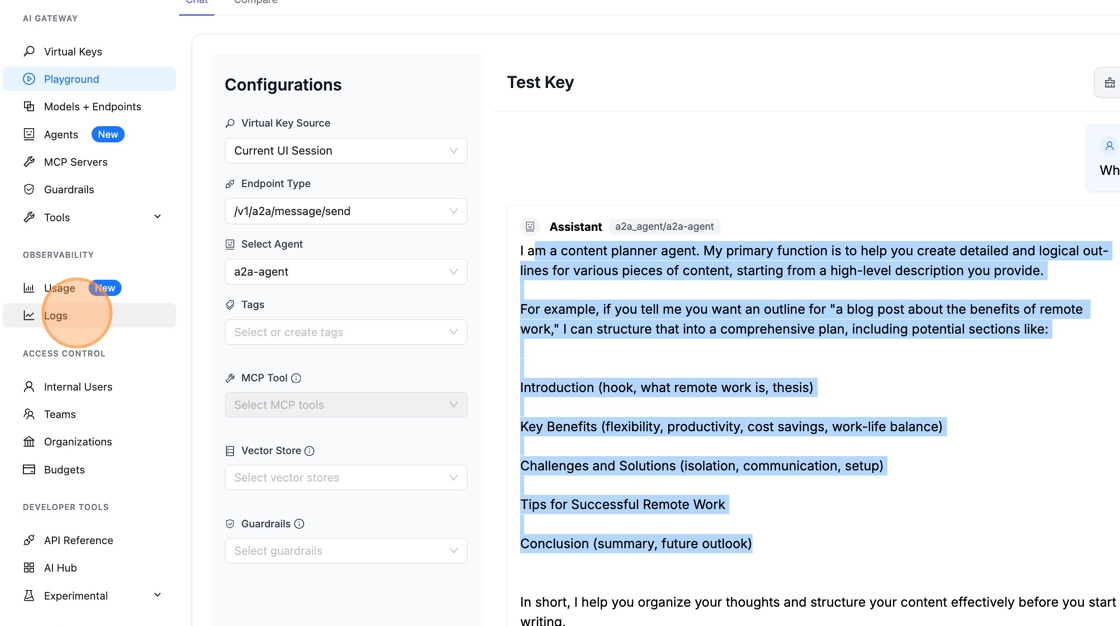
1. Go to Playground
Click "Playground" in the sidebar to open the interactive testing interface.

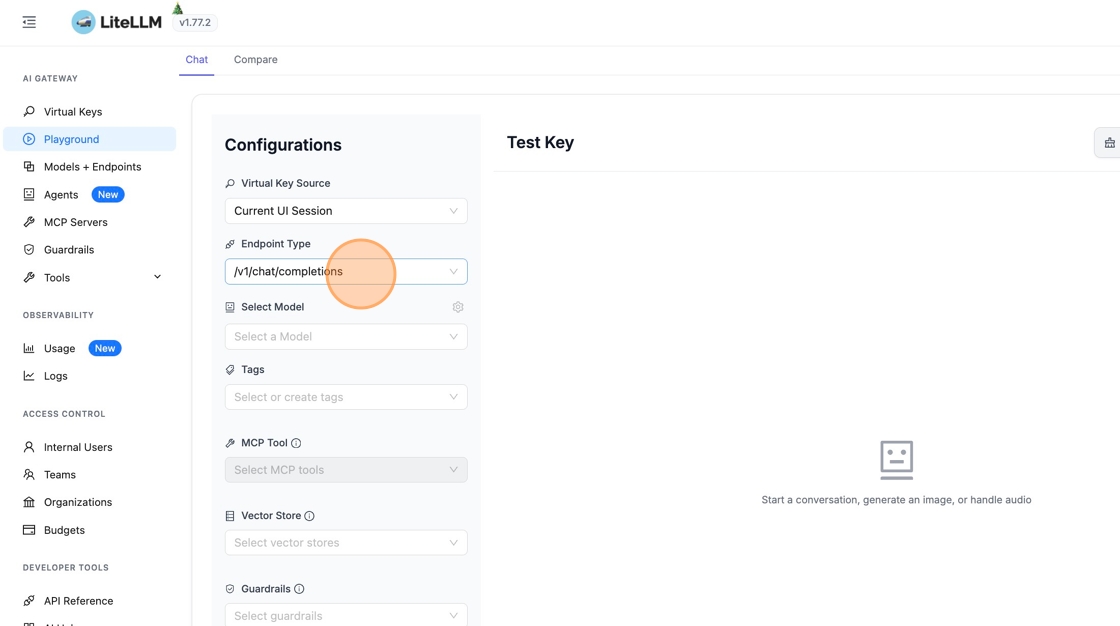
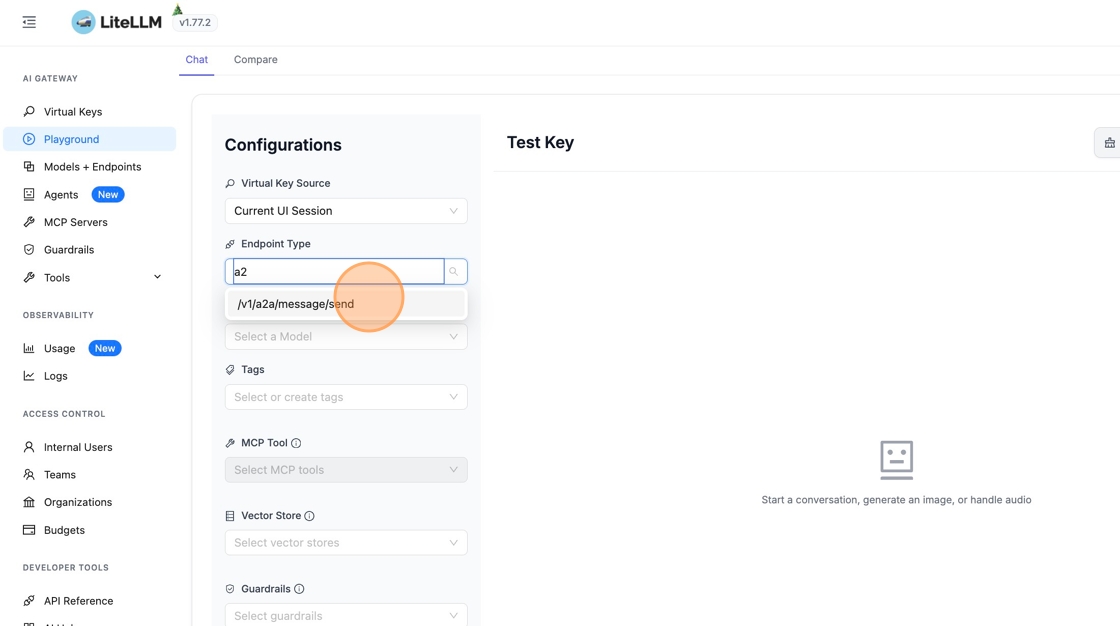
2. Select A2A Endpoint
By default, the Playground uses the chat completions endpoint. To test your agent, click "Endpoint Type" and select /v1/a2a/message/send from the dropdown.
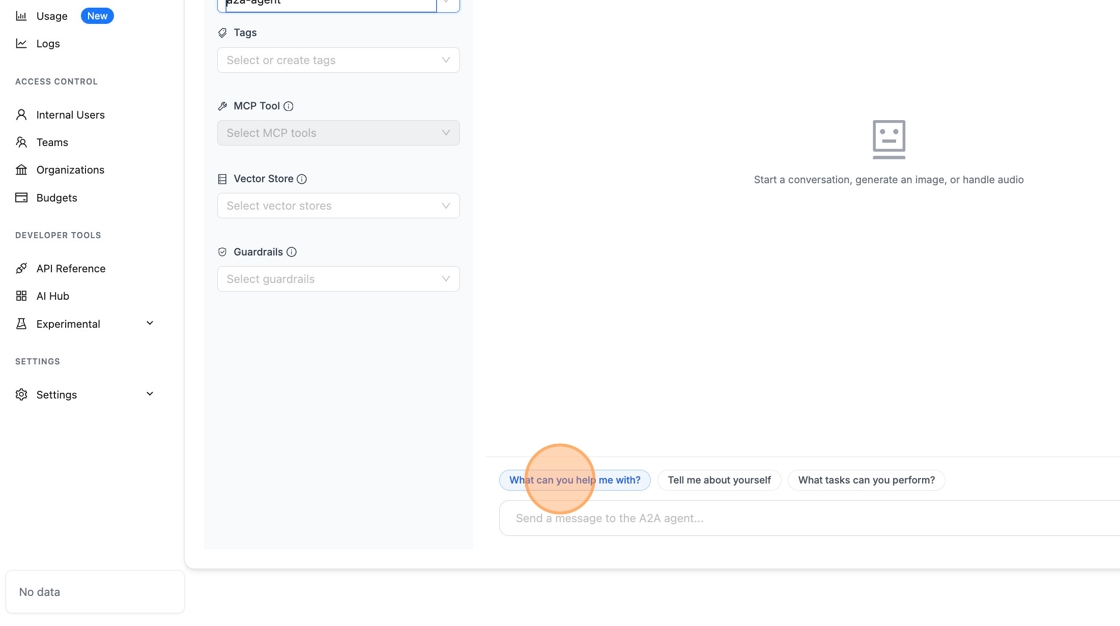
3. Select Your Agent
Now pick the agent you just created from the agent dropdown. You should see it listed by its display name.

4. Send a Test Message
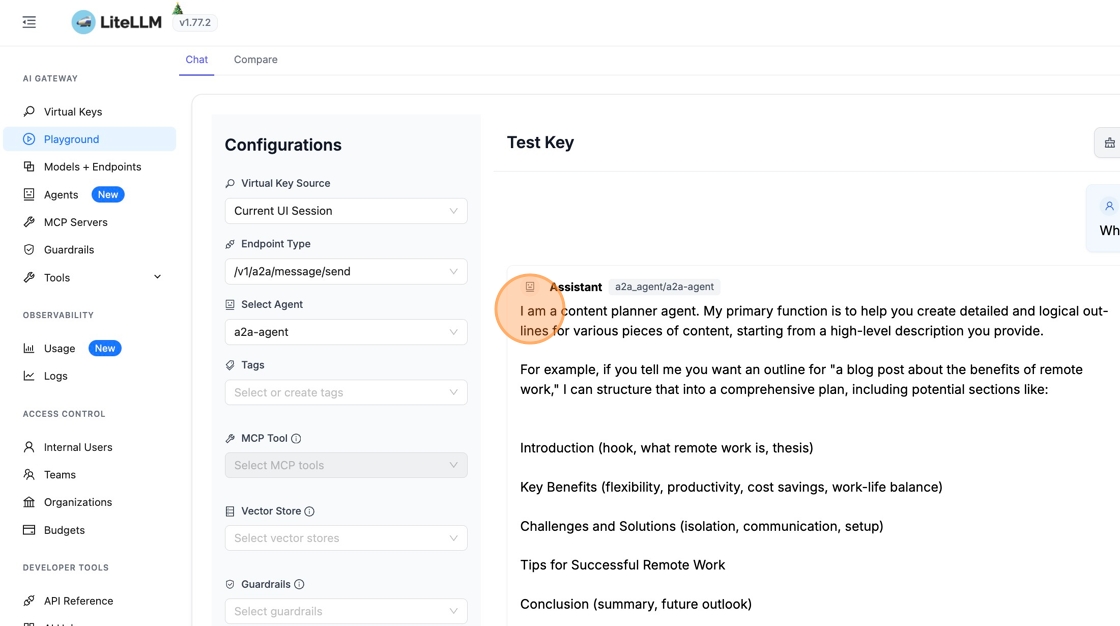
Type a message and hit send. You can use the suggested prompts or write your own.
Once the agent responds, the request is logged with the cost you configured.
Viewing Cost in Logs
Now let's confirm the cost was actually tracked.
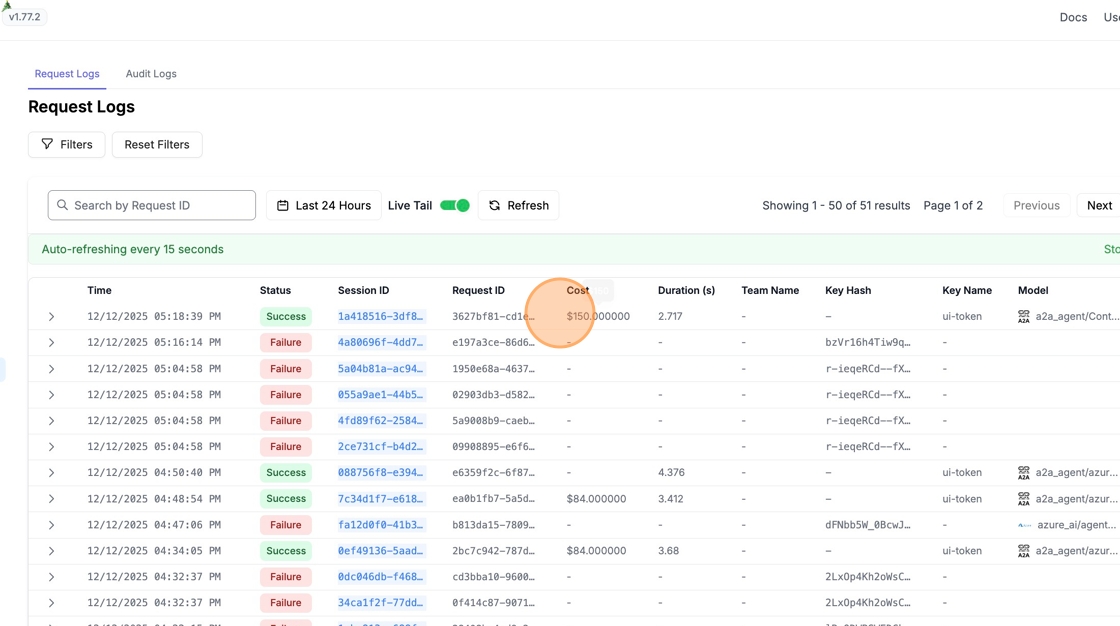
1. Navigate to Logs
Click "Logs" in the sidebar to see all recent requests.
2. View Cost Attribution
Find your agent request in the list. You'll see the cost column showing the amount you configured. This cost is now attributed to the API key that made the request, so you can track spend per team or project.
Cost Configuration Options
You can mix and match these options depending on your pricing model:
| Field | Description |
|---|---|
| Cost Per Query ($) | Fixed cost charged for each agent request |
| Input Cost Per Token ($) | Cost per input token processed |
| Output Cost Per Token ($) | Cost per output token generated |
For most use cases, a flat cost per query is simplest. Use token-based pricing if your agent costs vary significantly based on input/output length.